Image Inpainting
Overview
Image inpainting allows you to seamlessly fill in missing areas of an image or replace specific regions with new content guided by text prompts. This technique is perfect for removing unwanted objects, filling gaps, or creatively modifying specific parts of an image using Transformer Lab's intuitive masking interface.
Getting Started
Prerequisites
- Downloaded diffusion model with inpainting support (see Downloading Models)
- Source image to edit (uploaded or from generation history)
- Text prompt describing desired content for the masked area
- NVIDIA or AMD GPU with sufficient GPU memory for inference
Practical Example: Hair Color Change
Step-by-Step Inpainting Tutorial
Here's a real example of using Transformer Lab's inpainting feature to change hair color:
Step 1: Generate Base Image
First, create a base image using text-to-image generation:
full body, audrey hepburn, black hair, 18 years old, 1940’s, photoshoot, Fujifilm XT3 Viltrox, posing, instagram, happy smile, stand up, ultra detailed, sharp focus, elegant, jewels, urban background, rim lighting, short beige dress, beige kitten-heels, black gloves, pearl tiara, pearls necklace, brilliant pearl earrings, hdr, high contrast, sunlight, shadows, skin pore, pretty, beautiful, feminine, loving, in love, adorable , fashion, chic, excellence, leg, dress

Original generated image with black hair
Step 2: Create Hair Mask
Using the mask drawing tools, carefully paint over the hair area to define what should be changed:
Reference image with hair area masked for inpainting
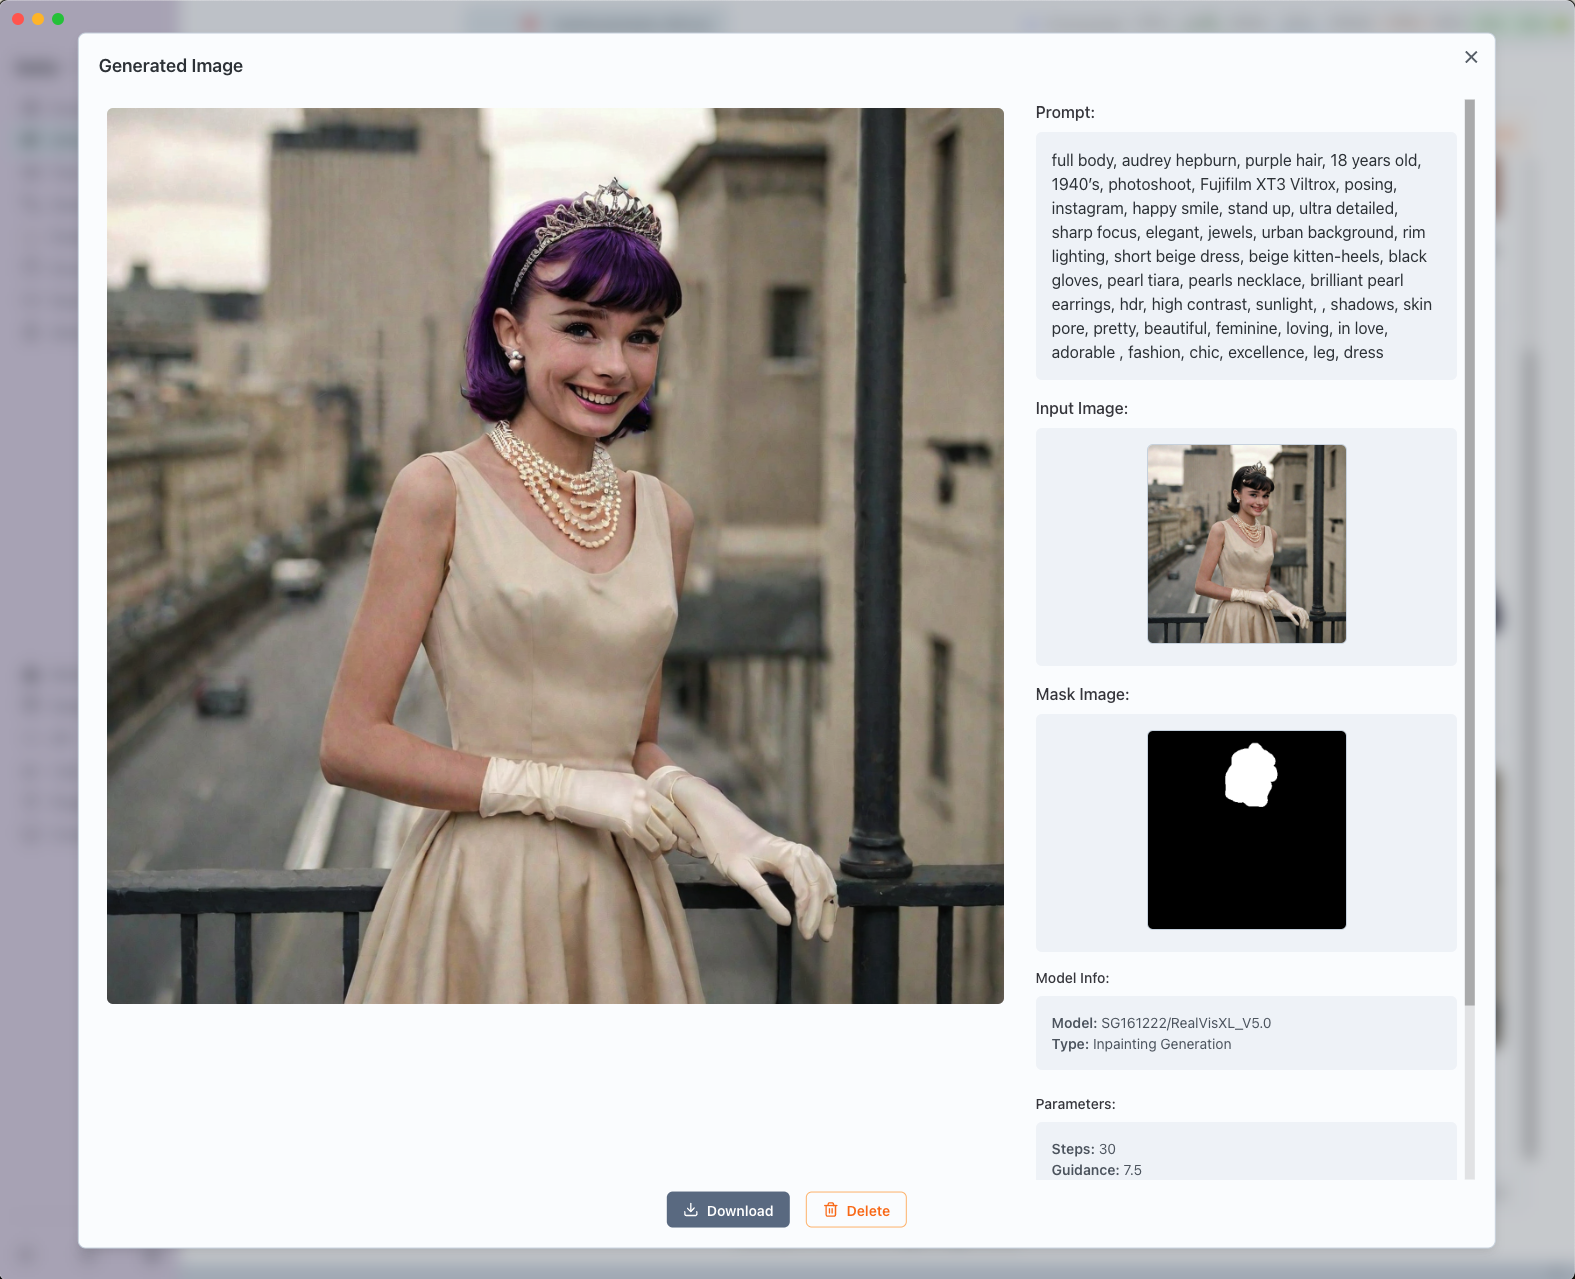
Step 3: Apply Inpainting
Use similar prompt as the original but change "black hair" to "purple hair":
full body, audrey hepburn, purple hair, 18 years old, 1940’s, photoshoot, Fujifilm XT3 Viltrox, posing, instagram, happy smile, stand up, ultra detailed, sharp focus, elegant, jewels, urban background, rim lighting, short beige dress, beige kitten-heels, black gloves, pearl tiara, pearls necklace, brilliant pearl earrings, hdr, high contrast, sunlight, shadows, skin pore, pretty, beautiful, feminine, loving, in love, adorable , fashion, chic, excellence, leg, dress
The result: seamlessly changed hair color while preserving all other image details!
Adding Background Elements: USS Enterprise
Here's another example showing how to add elements to an existing image background. This demonstration shows the complete process from uploading the original astronaut image, masking the background area, and applying the inpainting to add the USS Enterprise:
Complete USS Enterprise inpainting process: from original astronaut image to final result with starship in background
Process Overview:
- Upload: Original astronaut floating in space
- Mask: Paint over the background area where you want to add the USS Enterprise
- Prompt: Use descriptive text for the addition:
Add USS Enterprise starship in the background, detailed sci-fi spacecraft, space setting, distant stars, nebula, cinematic lighting, high quality, realistic
- Result: The iconic starship seamlessly integrated into the space scene while preserving the astronaut and original composition!
Common Use Cases
Object Replacement
Replace specific elements while maintaining the overall composition:
Replace the red car with a blue motorcycle, same lighting and perspective
Object Removal
Remove unwanted elements and fill with appropriate background:
Remove the person from the background, replace with more grass and trees
Style Modifications
Change specific style elements of objects or people:
Change the modern clothing to medieval attire, maintaining the same pose
Background Extension
Extend or modify backgrounds naturally:
Continue the beach scene with more sand and ocean waves
Creative Additions
Add new elements to existing scenes:
Add a majestic eagle flying in the cloudy sky